How to Build a Candy Bouquet for an Unforgettable Gift Idea
You can craft a show-stopping candy bouquet by choosing a sturdy base, arranging candies on skewers, and finishing with ribbon; secure sharp skewers safely to a

This article contains Amazon affiliate links. As an Amazon Associate, CandiesAndSweets earns from qualifying purchases.
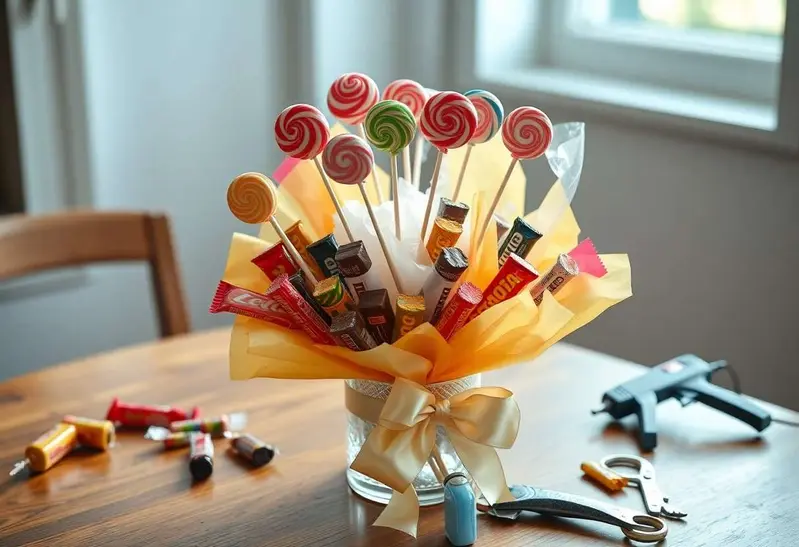
You can craft a show-stopping candy bouquet by choosing a sturdy base, arranging candies on skewers, and finishing with ribbon; secure sharp skewers safely to avoid injury, and pick colorful, long-lasting sweets for a joyful centerpiece.
How-to Guide: Gathering Essential Materials
Gather a sturdy base, floral foam, scissors, ribbon, and a variety of candies in mixed sizes so you can balance shapes and weight.
Ensure you also have floral wire, a craft knife, and extra packaging like cellophane; check each candy’s packaging for allergen warnings and expiration dates to avoid surprises.
Sourcing Skewers and High-Strength Adhesives
Select bamboo skewers or lollipop sticks (paid link) rated for food use; trim sharp ends and test for bend to confirm support. You should use high-strength adhesives like a hot glue gun for non-edible attachments but keep the burn risk in mind and work on a protected surface.
Selecting Fillers and Decorative Tissue Paper
Choose crinkle paper, shredded tissue, or foam peanuts to fill gaps; these materials add volume and conceal foam while keeping candy visible.
Mix colors that contrast with the candies and layer tissue to create depth; avoid glossy papers that may stick and keep loose paper away from heat because it is flammable.
How-to Guide: Constructing the Structural Foundation
Build the base by cutting foam to fit snugly inside your container, with enough depth for support. You should press the foam so it sits without wobble and add a layer of waterproof tape if the container is thin; a snug foam fit and a heavy base prevent tipping.
Balance the arrangement by marking a central axis and placing heavier candies toward the center and lower down. You can reinforce the center with a wooden dowel or floral pick; supporting the core keeps stems from shifting.
Securing the Foam for Maximum Stability
Place a non-slip material under the foam before inserting it, such as hot glue dots on the container bottom or double-sided tape. You should avoid glue contact with candy wrappers (paid link); hot glue can melt wrapping if applied carelessly.
Anchor the foam with skewers driven through the base into the foam for added hold when the bouquet is tall. You must trim exposed skewer ends and cover sharp points with tape; exposed sharp ends are a safety hazard.
Attaching Candy to Support Sticks Properly
Thread lollipops or wrapped candies onto sturdy wooden sticks or floral picks, securing with a small piece of tape near the base of the candy for extra grip. You should protect candies by keeping adhesives away from edible surfaces; avoid glue touching the candy.
Wrap the stick-candy junction with floral tape to hide the connection and add strength, stretching the tape as you wrap to activate its stickiness. You can angle heavier pieces inward to reduce top-heaviness and create visual depth; angled placement improves stability and appearance.
Trim excess stick length so candies sit at planned heights, and consider doubling up sticks for very heavy items to spread the load. You should test each piece by gently shaking the bouquet to confirm all attachments remain secure; loose attachments increase the risk of collapse.
How-to Guide: Masterful Arrangement Techniques
Use a tiered approach to build height and rhythm, alternating sizes and colors to keep the eye moving. You should plan core supports-floral foam or taped dowels-and hide them with filler candy so the arrangement feels light but structurally sound. Keep heavier pieces low and cluster similar shapes for cohesion.
Creating a Focal Point with Larger Items
Anchor the bouquet with a showpiece like a large lollipop or boxed chocolate, placing it slightly off-center for natural interest. You should secure the centerpiece with sturdy picks and wrap stems to prevent slipping; conceal mechanics with ribbon or tissue so the focal item reads as delightful and intentional.
Distributing Weight for Structural Balance
Balance heavier candies low and spread mass evenly around the stem-avoid stacking all weight on one side. You should test stability by gently shaking and reinforce with extra picks or a weighted base if wobble appears; cover any sharp skewers to keep the gift safe.
Center heavier pieces close to the container and angle lighter sweets upward to counterbalance; small clusters can act as counterweights. You should distribute color and size so your structure remains steady and test placement before final wrapping.
Expert Tips for Professional Presentation
Use a sturdy container and floral foam so you can anchor candies securely; set mixed heights and leave breathing space to maintain a clean presentation for your candy bouquet. You should secure heavier pieces near the center and tuck lighter treats at the edges to prevent tipping and create depth.
Knowing how to protect delicate wrappers and avoid overcrowding will keep the bouquet fresh; you can pad ends with tissue and avoid sharp skewers or exposed wiring that might puncture packaging or injure the recipient.
- Anchor the candy bouquet foam to the container for a stable base.
- Place heavy candies centrally and use shorter stems at the perimeter to balance weight.
- Cover sharp ends with tape and avoid sharp skewers near wrapped items.
Enhancing the Design with Ribbons and Bows
Add layered ribbons of varying widths and textures to hide stems and create movement; tie bows off-center for a handcrafted look and use double-sided tape instead of hot glue near sweets. Keep a few tails long to draw the eye and match ribbon tones to your palette for a professional finish.
Using Color Coordination for Visual Impact
Match two or three dominant hues plus a neutral to keep the arrangement cohesive; you can contrast warm and cool tones for punch and use wrappers as tiny accent patterns to boost color coordination and visual impact.
Choose colors by testing a small cluster in natural light and adjust saturation so larger pieces anchor the palette while smaller candies provide highlights; avoid matching every element exactly to keep the bouquet lively and let the recipient’s preferences guide you.
Tips for Personalizing Your Gift
Pair a curated selection of treats in your candy bouquet with a handwritten note and color-coordinated accents to show attention to detail; flag any allergies and small pieces that pose choking risks.
- Choose candies that reflect the recipient’s favorites to emphasize personalizing.
- Match wrapping and ribbons for strong presentation.
- Label ingredients and date-stamp for freshness.
Use unexpected touches like mini photos or a themed container to make the gift memorable. Assume that you confirm preferences and check freshness before presenting it.
Incorporating Non-Edible Keepsakes
Include small keepsakes-keychains, mini frames, or charms-securely anchored away from candy surfaces to avoid contamination and to add sentimental value; wrap any fragile items separately.
Customizing the Theme for Specific Occasions
Match color palettes and motifs to the event-pastels for a birthday, metallics for a wedding, or team colors for a game-day surprise-to reinforce the theme.
Switch candy types and decorative elements to suit the tone: playful picks and bright ribbons for casual parties, elegant chocolates and silk ribbon for formal celebrations.
Offer a quick checklist: pick a signature candy, choose coordinating accents, and add one meaningful keepsake to tie the occasion together.
Conclusion
To wrap up, you can craft a memorable candy bouquet by selecting a mix of textures and colors, securing treats on sturdy stems, arranging at varied heights, and finishing with quality wrapping and a personal note that delights the recipient.


