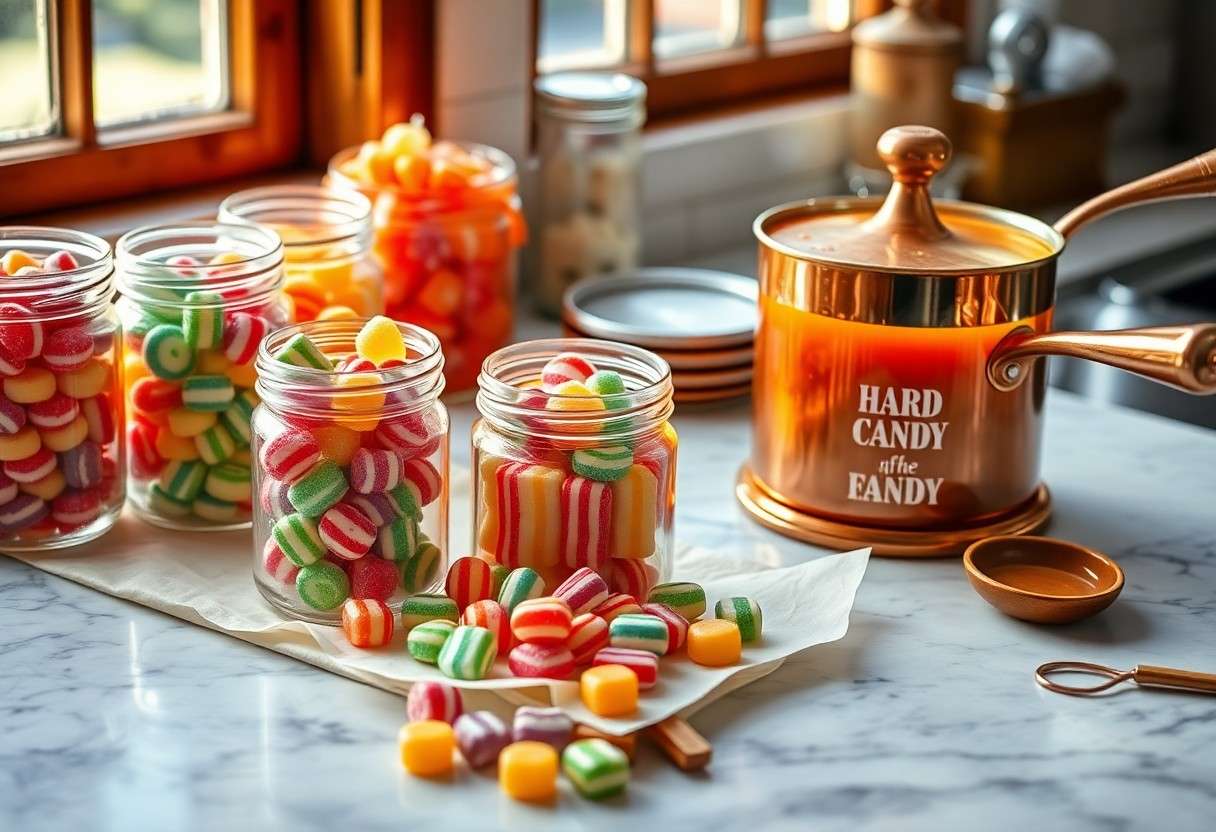
Ultimate Guide to DIY Candy Kits at Home
This guide empowers you to create delightful candy at home with ease. You'll explore various DIY candy kits that cater to all skill levels, allowing you to cust

This article contains Amazon affiliate links. As an Amazon Associate, CandiesAndSweets earns from qualifying purchases.

This guide empowers you to create delightful candy at home with ease. You’ll explore various DIY candy kits that cater to all skill levels, allowing you to customize flavors, shapes, and designs. From gummy bears to chocolate truffles, your kitchen can transform into a candy factory, where creativity knows no bounds. With simple step-by-step instructions, expert tips, and necessary tools listed, you’ll be equipped to indulge your sweet tooth while enjoying quality time with family and friends. Get ready to unleash your inner confectioner and make candy-making a fun, rewarding experience.
Types of DIY Candy Kits
When considering the variety of DIY candy kits available, it helps to categorize them based on the type of candy you want to create. Each type has its unique ingredients, techniques, and flavor profiles, allowing for a tailored candy-making experience. Below is a breakdown of several popular types, each bringing a different aspect of candy craftsmanship to your kitchen.
| Candy Type | Description |
|---|---|
| Chocolate Candy Kits | Prepare a delightful range of chocolates, from truffles to bars. |
| Hard Candy Kits | Craft classic hard candies like lollipops and jawbreakers. |
| Gummy Candy Kits | Create chewy and flavorful gummy confections. |
| Licorice Kits | Make your very own chewy licorice varieties. |
| Fudge Kits | Indulge in rich and creamy fudge creations. |
Each type of DIY candy kit offers a different level of challenge and fun, appealing to both novices and experienced candy makers. Chocolate candy kits are particularly popular for their luxurious taste and versatility, enabling you to combine different flavors, fillings, and toppings. Hard candy kits lend themselves to creative designs and colorful presentations, perfect for parties or gifts. Gummy candy kits are cherished for their nostalgic flavors and textures, providing a chewy treat that can cater to all ages. Each kit encourages you to experiment and personalize your candy crafting experience.
Any DIY candy kit you choose inspires creativity, transforming a simple kitchen task into a fun-filled adventure. Beyond the enjoyment of making food from scratch, these kits also allow you to bond with friends and family, sharing sweet moments over delicious homemade treats. Whether you’re hosting a candy-making party or just looking for a new weekend project, the variety of kits on the market ensures there’s something to satisfy every sweet tooth.
Chocolate Candy Kits
Chocolate candy kits typically include premium chocolate melts, molds, and various additives like sprinkles or flavoring oils. You can use melting chocolate to create everything from simple chocolate bars to intricate molded shapes, such as hearts, stars, or seasonal figures. Many kits also provide guidance on tempering chocolate, which enhances texture and shine, resulting in a professional quality finish. This process involves carefully heating and cooling the chocolate to stabilize it, ensuring that the final product has a satisfying snap and a glossy appearance.
One of the most enjoyable aspects of chocolate candy kits is the ability to customize your creations. You can mix in your favorite nuts, dried fruits, or even flavored extracts to impart a personal touch to your chocolates. Additionally, many kits come with multiple molds, allowing you to produce varied shapes and sizes. You might choose to create a lineup of assorted chocolates—some filled with caramel, others topped with sea salt, all designed to tantalize your palate and impress your friends and family.
For those planning to host a gathering or a fun family night, chocolate candy kits offer a fantastic interactive experience. Children and adults alike can engage in the melting, molding, and decorating process. Post-creation, you can even hold a taste-testing session to sample everyone’s artistic efforts. The combination of creativity and sweetness makes chocolate candy kits an excellent choice for anyone looking to infuse joy into their candy-making endeavors.
Hard Candy Kits
Hard candy kits provide an exciting foray into the world of confectionery, introducing you to classic techniques that have stood the test of time. With these kits, you’ll typically receive sugar, flavoring oils, and mold options, allowing you to create everything from lollipops to brittle candies. The process often involves boiling sugar to a precise temperature and then carefully pouring it into molds. Mastering this technique requires a bit of patience and practice, but the results are well worth the effort as you create bright, colorful candies that are both beautiful and delicious.
One of the appealing aspects of hard candy kits is the range of flavors you can experiment with. Traditional options include fruity flavors like cherry or lemon, but many kits also allow for unique combinations, like spicy cinnamon or sweet mint. This variety enables you to cater your candy to different tastes and occasions, whether it’s for a birthday party, seasonal celebration, or just a sweet treat at home. Depending on the kit, you can even create themed candies to match holidays or events, adding an extra layer of fun to your candy-making experience.
Once your hard candy creations are ready, they can be enjoyed immediately or packaged beautifully for gifts. The striking colors and designs of hard candies make them visually appealing, turning any simple gift into a delightful surprise. Moreover, sharing your homemade hard candies can spark conversations about the techniques you employed and the flavors you chose, providing an opportunity to bond over the art of candy making. Any DIY candy kit can be a source of entertainment, entertainment, and skill development for all ages.
Hard candy kits often come complete with instructional guides that demystify the candy-making process, allowing you to undertake your sweet adventure with confidence. As you proceed, you’ll find that each step—from boiling the sugar to shaping the final product—becomes an engaging exploration of culinary science. Hard candy making isn’t just about the end result; it’s about the process itself, making it a rewarding experience for everyone involved.
Gummy Candy Kits
Gummy candy kits are designed to introduce you to the fun and tactile world of chewy confections. Typically, these kits include gummy mix, molds shaped like bears, worms, or other fun figures, and sometimes even ingredient options to create your own flavors. The process involves dissolving the gummy mix, pouring it into the molds, and letting it set, which can be incredibly satisfying to watch. This simple method allows for quick results, making it perfect for kids and adults alike.
The beauty of gummy candy kits lies in their versatility and the creative freedom they offer. You can customize your gummy candies not only with different shapes but also with various flavors. Whether you prefer fruity, sour, or even tart flavor profiles, you can tailor the recipes to suit your palate. Many kits also suggest adding citric acid or flavor extracts to enhance the taste, giving you the ability to experiment and fine-tune your creations to perfection.
Beyond taste, gummy candy is an excellent avenue for artistic expression. Once your gummies have set, consider rolling them in sugar or using edible glitters for a fun finishing touch. This additional step elevates your candy-making game and enhances the visual appeal. Gummy candies are also perfect for packaging as treats to share at parties or to enjoy as a fun personal reward. Any candy lover will appreciate the joy of making gummy candies and dining on their creations.
Gummy candy kits not only provide a hands-on cooking experience but also encourage creativity and taste exploration, making them ideal for individuals, families, and gatherings. By experimenting with different molds and flavors, you’ll likely discover a newfound love for gummy candy making.
Essential Tips for Success
- Stay organized: Gather all your tools and ingredients beforehand.
- Follow recipes closely, especially when measuring ingredients.
- Be patient with each step; rushing can lead to mistakes.
- Experiment with flavors while remaining mindful of balancing sweetness.
- Document your process; noting what works will help refine future attempts.
Planning and Preparation
Before venturing into your candy-making adventure, thorough planning and preparation are vital. Begin by selecting a specific candy type, be it gummies, chocolate, or hard candy. Research various recipes to understand the techniques involved and make a list of all necessary ingredients and tools. Consider the scale of your project; are you making a small batch just for family, or do you want to create enough to share at a party? Having a clear plan will streamline your process and enhance the fun of creating your confections.
Once you’ve chosen your candy recipe, dedicate a workspace that is clean and organized. Clear off your kitchen counter or table, and ensure all surfaces are sanitized. Gather all cooking utensils, mixing bowls, measuring cups, and any specialty tools specific to your candy kit, such as candy molds or thermometers. Having everything within reach minimizes interruptions during the candy-making process and helps maintain momentum.
Your preparation doesn’t stop at tools and ingredients. It’s also wise to plan your time effectively. Set aside a few uninterrupted hours to focus solely on making candy. This dedicated time will allow you to fully immerse yourself in the craft, reducing the stress of having to pause or rush through steps. Any last-minute distractions can lead to missteps that might affect the final product.
Ingredient Selection
The selection of high-quality ingredients fundamentally impacts the taste and texture of your homemade candy. Start by purchasing fresh ingredients, like real fruit purees for gummies, or premium chocolate for fudges and truffles. Whenever possible, opt for natural flavorings and colors to enhance the overall quality of your candies. For many recipes, a single ingredient—such as an overly sweet corn syrup—can overshadow the other nuanced flavors you aim to achieve. Your choice of ingredients should align with the candy’s intended flavor, texture, and dietary requirements, ensuring a delightful outcome.
Pay close attention to specialty ingredients that might elevate your candy-making experience. For example, using organic gelatin instead of the standard variety can produce a more desirable chewy texture in your gummies, while artisanal chocolate can add depth in flavor to your confections. Moreover, if you are considering adding nuts or candies as inclusions, select those that are freshly roasted or vibrant in color to enhance both appearance and taste. Spices like sea salt or citrus zest can also elevate the overall flavor profile, offering several layers of taste.
Ingredient selection goes beyond merely opting for the highest price tag; balance is crucial in candy-making. Consider seasonal ingredients that may lend a unique twist to your confections, and don’t hesitate to experiment with different categories, such as spices or herbs, that could inventively transform the typical candy flavors. Any mismatch in ingredient quality or specification could lead to disappointing results, so selecting wisely is vital for achieving that ideal sweet treat.
Step-by-Step Guide to Making Candy
Tools and Equipment Needed
Essential Tools for Candy Making
For a successful candy-making experience, you first need important tools that will aid you in every step. A heavy-bottomed saucepan is vital, as it ensures even heat distribution, thereby preventing the sugar from burning. A candy thermometer is equally important; it helps you accurately measure the temperature of the sugar mixture, crucial for achieving the desired candy texture. Additionally, silicone spatulas are handy for stirring and scraping, and measuring cups and spoons will guarantee that your ingredients are precise. Finally, having a reliable baking sheet lined with parchment paper is important, as it provides an easy surface to work with and allows for simple cleanup later.
Your workspace should also be well-prepped with a few other key items. Consider having small bowls or containers for pre-measured ingredients; this streamlines the process and keeps everything organized as you cook. A food processor can be useful if you’re making any types of candy that require chopping ingredients, such as nuts or chocolate. If you’re dealing with hot sugar mixtures, wear heat-resistant gloves to protect your hands from burns while working with sticky substances.
Lastly, don’t underestimate the benefit of having fun accessories. Various molds can be used to shape your candy, providing you the chance to get creative. For some recipes, like chocolate truffles or lollipops, using a good quality chocolate melter will also simplify the process and yield better results. With your tools adequately assembled, you are well on your way to crafting delicious homemade candy.
Detailed Instructions for Each Type
Different Candy Types and Their Processes
Once you’ve gathered your tools, moving on to the specific types of candy you want to create is the next step. For hard candies, like lollipops, start by combining sugar, corn syrup, and water in your saucepan. Heat the mixture to 300°F, which is the hard crack stage. Pour it onto your lined baking sheet and once slightly cooled, you can cut or shape it as desired. Conversely, for gummy candies, a mixture of sugar, gelatin, and juice can create delightful chewy treats. This mixture is typically heated to a lower temperature, around 200°F, enabling the gelatin to dissolve properly without transforming into a hard candy. Allow the mixture to cool in molds before removing them.
Making chocolates requires a slightly different approach, particularly if you’re tempering chocolate. Start by melting your chocolate in short bursts in the microwave or over a double boiler. Tempering involves cooling and reheating the chocolate to stabilize it; this ensures a glossy finish and a satisfying snap when you bite into it. Once tempered, you can either mold it or dip snacks of your choice. The waiting time can be critical; be sure to let your creations set properly at room temperature for the best results.
Each type of candy showcases unique methods that require adjustments in both technique and timing. When you venture into making more specialized candies, like marshmallows or brittle, the specific proportions of ingredients and precise temperature control become vital for achieving the right consistency. You might find it useful to keep a journal of your attempts, noting what worked and what could be improved, as candy-making often involves a bit of trial and error before achieving perfection.
Factors to Consider
When initiateing on the journey of creating your own DIY candy kits, several factors influence your overall experience and the success of your endeavors. Each detail, from the ingredients you use to the tools you require, can significantly impact the final product. It’s vital to assess the accessibility of materials, your personal skill set, and the specific outcome you envision. Additionally, understanding the nuances of different candy-making techniques can guide you in selecting a project that aligns with your tastes and capabilities. Here are a few imperative aspects to keep in mind:
- Ingredient availability
- Equipment requirements
- Skill level needed
- Time commitment
- Target audience for your candy
Knowing the right ingredients and equipment allows you to streamline the process, ensuring that your DIY experience remains enjoyable and successful. Experimenting with different flavor combinations and types of candy will also help you refine your preferences, enabling you to choose the most suitable projects in the future.
Difficulty Level
Difficulty levels vary greatly across candy recipes, ranging from simple options like chocolate-dipped pretzels to more intricate creations such as homemade truffles or taffy. Assessing your culinary skills and comfort in the kitchen is imperative before plunging into a specific project. Simple kits are perfect for beginners or those looking to engage kids in a fun kitchen activity. You might choose easy-to-follow recipes that require minimal cooking skills and simple ingredients, ensuring a satisfying experience without the stress of potential failure.
If you identify as more experienced, you might want to challenge yourself with advanced candy-making techniques, such as tempering chocolate or making candy from scratch. For instance, preparing nougat or marshmallows involves precise temperatures and timing, which adds complexity but can also result in impressive, high-quality sweets that are sure to dazzle your friends and family. Evaluating your skill set before selecting a kit can help streamline the learning curve, leading to better outcomes and more enjoyable experiences.
As you gain confidence, you may even want to create your own personalized kits, customizing recipes to suit your flavor profiles. This progression allows you to build your candy-making repertoire over time, moving from simple to more intricate recipes. Tailoring your kits to challenge your skills fosters a creative atmosphere and encourages experimentation in the kitchen.
Time Commitment
The time you invest in your DIY candy projects can greatly influence your satisfaction with the finished product. Some recipes take just 30 minutes to prepare, while others like homemade candy bars or gummy candies can require several hours, especially when factoring in the cooling and setting times. Evaluating how much time you have available will help you choose the ideal project. If you’re crunched for time, quick options can provide instant gratification, such as chocolate-covered fruits or popcorn treats, while longer projects might be better saved for a leisurely weekend.
Additionally, consider your plan for assembling and packaging your candy. If it’s for a special occasion or holiday, you might not want to commit to time-intensive projects that could leave you rushed. Setting a clear timeline for completing your candy will help you manage your expectations and avoid unnecessary stress. Use a calendar or checklist to break down the steps required for each recipe and allocate time for each phase, ensuring that you have enough time to enjoy the process.
A delicate balance between the complexity of the recipe and your availability is key. It’s beneficial to build your skills gradually, selecting recipes that fit not only your expertise but also the time you can dedicate to enjoy the craft fully. Managing your time effectively will enhance your DIY candy experience, leaving you with more room for creativity and less chance of feeling overwhelmed.
Age Appropriateness
Choosing a candy-making project that aligns with the age of your participants is crucial for an enjoyable experience. For young kids, simple projects involving non-cook recipes, such as chocolate-dipped fruits or no-bake rice crispy treats, are ideal. These activities often require minimal supervision and can be both fun and educational. As children grow older, their dexterity and ability to follow instructions improve, allowing for more complex candies that may involve baking or cooking on the stovetop.
For teens and adults, the selection can include more nuanced techniques such as candy molds or even entirely homemade confections like gumdrops and caramels. These options offer opportunities for skill development and experimentation with flavors, allowing you to examine deeper into the art of candy-making. It’s important to assess each age group, ensuring that the complexity of the recipes matches their capabilities. Providing age-appropriate options can lead to a more fulfilling and cooperative experience in the kitchen.
Understanding the age appropriateness of your candy projects ensures safety and fun. Keeping these considerations in mind will also facilitate teamwork and creativity, making the experience enjoyable for everyone involved.
Pros and Cons of DIY Candy Kits
| Pros | Cons |
|---|---|
| Customizable flavors and ingredients to suit your taste. | Potential for a steep learning curve if you’re new to candy making. |
| Fun activity for families or group gatherings. | Time-consuming process compared to purchasing pre-made candy. |
| Healthier options by using organic or natural ingredients. | Possible higher cost than store-bought candy, depending on ingredients. |
| Opportunity to develop your culinary skills. | Can be messy, requiring cleanup after the candy-making process. |
| Sense of satisfaction from creating your own treats. | Difficulty in achieving professional-level candy textures or flavors. |
| Unique gifts for friends and family. | May require specialized tools or equipment that you don’t have. |
| Educational experience that teaches chemistry and cooking basics. | Ingredients may not always be readily available. |
| Possibility to create personalized candy for events. | Requires patience and experimentation to perfect recipes. |
| Inspiration for creativity with presentation and design. | Risk of failed batches, leading to wasted ingredients. |
| Can forge memorable experiences with loved ones. | May not yield consistent results initially. |
Benefits of Making Your Own Candy
Creating your own candy offers a level of customization that is often not possible with store-bought options. You can select flavors that cater to your preferences or dietary needs, such as vegan or gluten-free options. For example, you might experiment with alternative sweeteners like agave syrup or honey if you’re looking for healthier substitutes. This flexibility can lead to discovering new favorite flavors that resonate more with your unique taste.
Engaging in DIY candy making can also be a delightful and enriching experience for families and friends. It not only provides an entertaining activity but also fosters teamwork and collaboration. Whether it’s brainstorming ideas for candy shapes or deciding on the final decorations, these shared moments create lasting memories. Hosting a candy-making party might inspire laughter and cheer, as everyone gets involved in the creative process, deepening bonds and connections.
Furthermore, the sense of accomplishment after successfully making your own candies is unparalleled. There’s an intrinsic reward when you see those candies come to life, from mixing your ingredients to the satisfied smiles when they’re finally ready to eat. This journey from conception to creation nurtures creativity and patience and instills a sense of pride, making your homemade candies feel like a special gift that you crafted with care.
Challenges You May Face
While making candy at home is enjoyable, it does come with its share of challenges. One of the primary hurdles is mastering the techniques involved, where even experienced cooks may face trial and error. You might encounter issues like sugar crystallization or incorrect temperatures that can affect the texture and flavor of your candies. Understanding the science behind candy-making, such as the importance of temperature control or the role of different ingredient properties, is crucial to overcoming these initial hurdles.
Another significant challenge lies in the time investment required for candy making. Preparing ingredients, cooking, and waiting for the candies to set can be quite time-consuming compared to simply buying ready-made treats. Finding the right balance between your schedule and the time needed for experimenting with candy-making at home can be a difficult task. It’s important to allocate enough time to enjoy the process without feeling rushed or overwhelmed.
Lastly, sourcing quality ingredients can become a daunting task. While it’s easy to find commercial candies everywhere, you may discover that specific ingredients for unique recipes aren’t as readily available. This might require you to visit specialty stores or shop online, potentially increasing your overall costs and complicating the process. Being prepared for these unexpected hurdles can help streamline your DIY candy-making journey.
Creative Variations and Additions
Unique Flavor Combinations
Concerning crafting your DIY candy kits, experimenting with unique flavor combinations can elevate your confections beyond the ordinary. Consider using unexpected ingredients such as sea salt with caramel, which creates a delightful contrast that enhances the rich sweetness. Or, try infusing your chocolate with herbal notes by incorporating lavender or rosemary, yielding a gourmet experience that surprises and delights the palate. If you’re a fan of fruit flavors, think about combining zesty citrus with creamy components, like a lemon-lime ganache paired with a coconut filling. These innovative pairings not only enhance the taste but also ignite curiosity among those who try your creations.
You might also explore regional ingredients to create a themed candy kit that showcases local flavors. For instance, incorporating matcha and yuzu can transport your taste buds to Japan, while using Mexican chocolate with cinnamon and chili can add a spicy kick reminiscent of traditional Mexican desserts. You can even collaborate with local producers to source unique materials that tell a story about your community. Each bite can evoke a sense of place, making your candies not just a sweet treat but also a culinary journey.
Seasonality offers another opportunity to inspire your flavor combinations. During autumn, consider crafting candies with pumpkin spice or warm apple flavors, while summer can be celebrated with fresh berry bursts or tropical notes. Tailoring your candy kits to reflect season-specific flavors not only engages your audience but also increases their excitement to create. Such thoughtful selections can lead to memorable holiday gifts or themed party favors, making your DIY kits even more appealing throughout the year.
Decorative Techniques
As imperative as the flavors themselves, the visual appeal of your candy creations greatly enhances the overall experience. You can implement a variety of decorative techniques, such as using edible glitter or gold dust to give your candies a luxurious finish. A simple sprinkle of these embellishments can transform even the most basic candies into show-stopping confections that attract the eye and invite tasting. Additionally, consider the use of vibrant-colored candy melts to coat your chocolates and add a pop of color, turning an ordinary treat into an eye-catching masterpiece.
Another strategy to enhance the visual flair is to use molds that create intricate designs. Molds come in an array of shapes and sizes, from classic geometric forms to playful characters, allowing your creativity to run wild. You might opt for holiday-specific designs—think pumpkins for Halloween or hearts for Valentine’s Day—that align with upcoming celebrations. Layering different colors of chocolate or candy can also create stunning effects, where each layer showcases a unique color or flavor, making the unwrapping experience as enjoyable as the tasting.
Additionally, piping techniques can add a personal touch to your candies. For example, you can create delicate patterns or messages on chocolate-covered treats, adding an element of customization that speaks to your friends and family. You could include pre-filled piping bags in your DIY kits, allowing recipients to unleash their creativity and apply gusto to their work. Incorporating these decorative strategies not only leads to visually appealing results but also encourages the joy of crafting unique candy creations that stand out.
Final Words
Considering all points, creating DIY candy kits at home offers you a wonderful opportunity to unleash your creativity and indulge in the sweet world of confectionery. By taking the time to explore the various components of candy-making, such as selecting ingredients and mastering techniques, you not only enhance your skills but also gain insight into the art of candy crafting. This guide has provided you with a comprehensive overview of the crucial tools, recipes, and tips to ensure your candy-making experience is both enjoyable and successful. As you commence on this sugary adventure, embrace the possibility of experimenting with flavors and textures that suit your personal preferences.
In addition to enhancing your culinary repertoire, DIY candy kits allow for enjoyable moments with friends and family. You can transform a simple gathering into an unforgettable experience by involving loved ones in the candy-making process. Whether it’s decorating your creations with creative toppings or hosting a tasting party, these activities will foster connections and create lasting memories. As you engage in this delightful pastime, you can share your knowledge and tips with others, amplifying the sense of community that candy-making cultivates.
Ultimately, the world of DIY candy kits at home empowers you to explore your imaginative side while enjoying the sweet rewards of your labor. The flexibility and variety of options available ensure that your candy-making projects can be tailored to fit any occasion or preference. As you gain confidence in your ability to create delicious treats from scratch, you’ll discover a sense of accomplishment that only sweet creations can bring. So, gather your supplies, invite your creativity, and transform your kitchen into a candy haven that reflects your unique flavor and style.