How Artisanal Chocolatiers Temper Chocolate Perfectly
Tempering chocolate is an important process that transforms your chocolate into a glossy, smooth treat with a satisfying snap. As you explore the techniques use

This article contains Amazon affiliate links. As an Amazon Associate, CandiesAndSweets earns from qualifying purchases.
Part of our Single-Origin & Artisanal Chocolate guide.
Tempering chocolate is an important process that transforms your chocolate into a glossy, smooth treat with a satisfying snap. As you explore the techniques used by artisanal chocolatiers, you’ll uncover the science behind achieving the perfect crystal structure in cocoa butter. This knowledge empowers you to create confections that not only taste delectable but also have an appealing texture and appearance. By mastering tempering, you can enhance your chocolate-making skills and elevate your sweet creations to professional standards.
The Science of Tempering
Understanding Cocoa Butter Crystals
Cocoa butter, the fat derived from cacao beans, plays a pivotal role in chocolate’s texture and stability. It contains different types of crystals, with stable beta crystals being the desired form for the best chocolate. These beta crystals attribute the glossy sheen and satisfying snap when you break a chocolate bar. Without proper tempering, your chocolate may form unstable crystals, leading to a dull appearance and a lack of that desirable texture. As you work with chocolate, the goal is to manipulate the cocoa butter to encourage the formation of these stable crystals, enhancing both visual presentation and mouthfeel.
Observing your chocolate closely during this process can provide valuable insights. For example, when the temperature drops and cocoa butter begins to re-solidify, you might see streaks or a milky texture appearing in the chocolate. This indicates that improper tempering has occurred, and you may need to start over. Becoming familiar with how cocoa butter behaves at different stages of tempering allows you to fine-tune your technique and achieve consistently smooth, shiny chocolate that melts wonderfully in your mouth.
| Type of Cocoa Butter Crystal | Characteristics |
|---|---|
| Alpha | Weak, unstable, and crumbly. This form is undesirable for chocolates. |
| Beta Prime | Moderately stable, can be used but lacks the desirable snap. |
| Beta | Stable, glossy, the perfect form for achieving the best texture and snap. |
The Importance of Temperature Control
Temperature control is integral to the tempering process, significantly influencing the final quality of your chocolate. Different chocolate types, such as dark, milk, and white, have specific melting and setting points, making it imperative to adjust your method accordingly. For dark chocolate, start by melting it at around 45-50°C, then cool it down to about 27°C before warming it slightly again to around 31-32°C for dark chocolate. Milk and white chocolates require slightly lower temperatures, typically starting at about 40-45°C and moving between 26-30°C for cooling and reheating.
By maintaining these precise temperature ranges, you facilitate the proper crystallization of cocoa butter. It’s not just about reaching a high temperature and cooling down; you’re creating an environment that encourages the formation of beta crystals while discouraging their predecessors. Many chocolatiers utilize a thermometer to monitor the chocolate consistently, ensuring that you adhere to the required values. Inaccurate temperature readings can lead to disasters that affect the taste, texture, and aesthetic appeal of your chocolate.
With practice, you will discover that the quality of your equipment can significantly impact outcomes. Some chocolatiers prefer using marble slabs for cooling because the temperature of the slab aids in achieving the correct cooling for the chocolate. Others might use tempering machines that automate the heating and cooling process, providing an efficient way to maintain temperature stability. Each method has its own merits, but the underlying principle of controlling temperature remains the same, and your choices should align with your comfort level and desired end results.
| Chocolate Type | Melting Temperature Range (°C) |
|---|---|
| Dark Chocolate | 45-50 |
| Milk Chocolate | 40-45 |
| White Chocolate | 40-45 |
Proper temperature control not only ensures the physical attributes of your chocolate but also influences the flavor profile. Chocolate that is tempered at the correct temperatures allows for the full expression of its flavor, as volatile compounds remain intact. Keeping a close eye on the process will help you deliver chocolate that is not only visually appealing but also deliciously rich in taste. Your attention to detail during tempering will pay off with chocolate that has a professional finish, enticing texture, and delightful taste.
Techniques for Tempering Chocolate
The Seeding Method
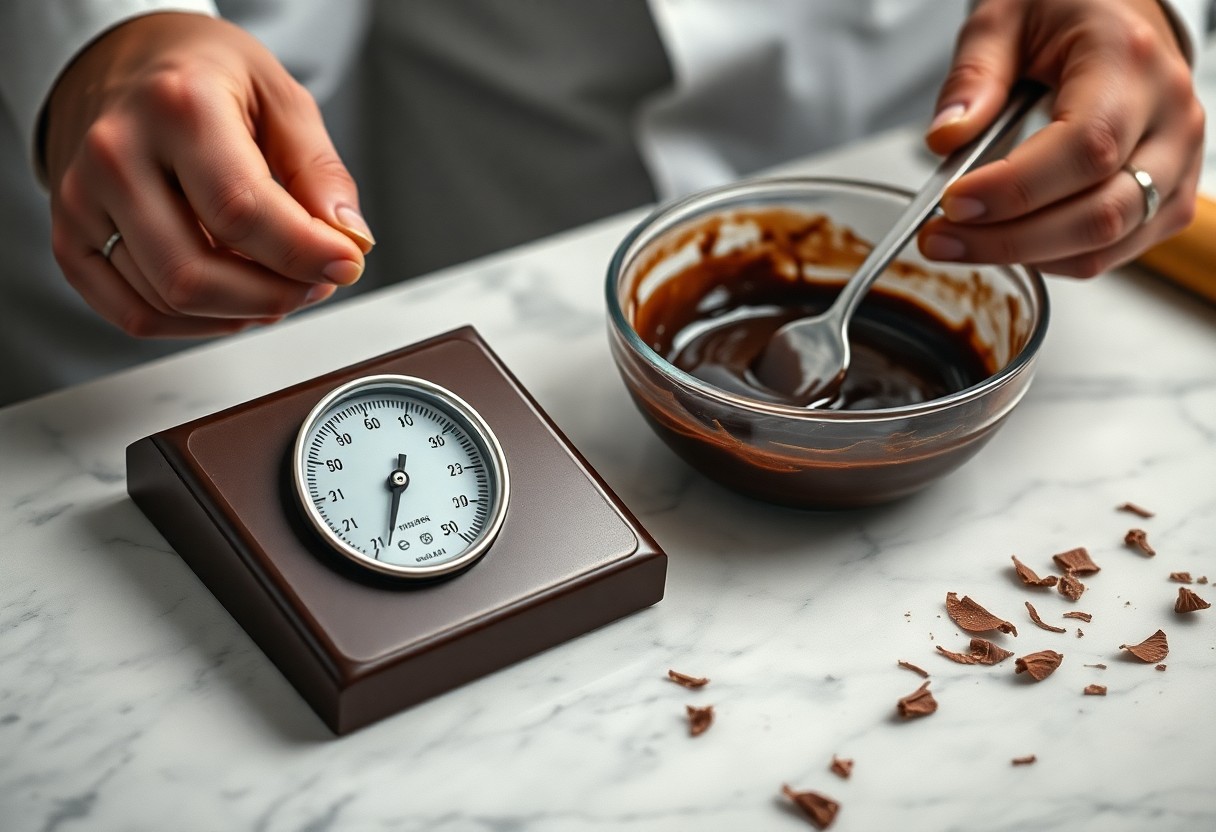
The seeding method is an accessible and efficient process that allows you to temper chocolate with relative ease. Start by melting your chocolate to about 115°F (46°C) for dark chocolate, or around 110°F (43°C) for milk and white chocolates. Once the chocolate is fully melted and smooth, you’ll introduce solid chocolate pieces-known as “seed” chocolate-into the mix. This seed chocolate should be finely chopped to increase the surface area, allowing it to melt quickly and help achieve the desired crystalline structure. Stir continuously as the seed chocolate incorporates; this motion distributes the cocoa butter crystals and encourages the formation of stable crystals throughout your melted chocolate.
As you initiate stirring, pay attention to the temperature of your mixture. Ideally, it should cool to around 82°F (28°C) before you gently reheat it to a working temperature of about 88°F (31°C) for dark chocolate, or between 84°F and 86°F (29°C to 30°C) for milk and white chocolates. The key here is to avoid overheating during the re-melting phase. You can achieve this by using a gentle heat source, such as a warm water bath, rather than direct heat. This method allows you to maintain control over the chocolate’s temperature and texture while ensuring you don’t disrupt the formation of those stable crystals.
The seeding method not only offers a hands-on approach to tempering but also serves as an excellent way to mitigate the risks associated with traditional methods. If you’re looking for a conveniently manageable process, consider incorporating the seeding technique into your chocolate-making routine. Many chocolatiers prefer this method for its reliability, as it consistently yields beautiful, glossy chocolate with a satisfying snap when broken. By practicing the seeding method, you’ll gain a deeper understanding of the science behind tempering and develop your skills as a chocolatier.
The Tabling Method
The tabling method, on the other hand, involves pouring your melted chocolate onto a cool marble or stone surface. Start by melting your chocolate to the appropriate temperature for the type you are working with, similar to the seeding method. Once fully melted, transfer a portion of the chocolate onto the cool surface. Using a spatula, spread the chocolate out into a thin layer; this process helps cool it down rapidly while also encouraging the formation of stable cocoa butter crystals. As you work the chocolate on the table, gather it back into a pile at intervals to promote uniform cooling and crystallization. The tactile nature of this method can enhance your connection to the chocolate, allowing you to observe the changes in texture and thickness as it begins to set.
As the chocolate cools and thickens, you’ll want to work it back into the melted pool to raise the temperature slightly to achieve the re-melting phase. The key here is precision: you should continue to check your chocolate’s temperature with a thermometer to ensure it stays within the ideal range for final use. Once the chocolate is tempered, you can pour it into molds, dip confections, or use it in various applications. Mastering the tabling method requires practice and familiarity, but the results-a beautiful sheen and satisfying snap-are well worth the effort.
Many professionals appreciate the tabling method for its hands-on aspect and the immediate feedback it provides. This technique encourages an intimate understanding of the chocolate, as you engage directly with its consistency and temperature. When well executed, the tabling method can yield exceptionally high-quality results that enhance the overall aesthetic and flavor profile of your chocolate creations.
Tools and Equipment for Artisanal Chocolate Tempering
Essential Tools for the Chocolatier
Your journey into chocolate tempering hinges significantly on having the right tools by your side. A high-quality thermometer is fundamental, as precision is non-negotiable in achieving the correct temperatures for tempering chocolate. Infrared thermometers are popular due to their convenience and quick readings, while probe thermometers can provide continuous temperature tracking, allowing you to focus on the task without interruptions. In addition, a marble slab or tempered granite surface is ideal for the tabling method. The smooth and cool surface aids in efficiently lowering the chocolate’s temperature, promoting the formation of stable cocoa butter crystals.
Another indispensable tool is a spatula; opting for a large, flexible silicone spatula can make a significant difference during the tempering process. Such a spatula not only allows for folding and mixing the chocolate without damaging its structure but is also flexible enough to scrape the chocolate from edges of your bowl cleanly. Furthermore, having a set of small stainless steel bowls for your chocolate can streamline the process, enabling easy measurement and handling of different chocolate batches or varieties, especially when experimenting with flavors.
Don’t overlook the benefits of a double boiler as well, which serves as a gentle melting option when working with chocolate. With this type of equipment, you can control heat levels better and avoid scorching the chocolate, which can inhibit the tempering process. A good quality double boiler contains two pots, with one sitting atop the other filled with simmering water. This indirect heat is crucial for achieving a silky texture in your melted chocolate, laying the groundwork for a successful temper.
Choosing the Right Type of Chocolate
The type of chocolate you choose to temper plays a pivotal role in the outcomes of your confectionery endeavors. When considering chocolate, you will primarily select from dark, milk, or white varieties, each bringing its unique melting point and tempering characteristics. Dark chocolate typically has the highest cocoa solids and the lowest sugar content, creating a robust flavor while requiring a higher tempering temperature, typically around 88°F to 90°F. Conversely, milk chocolate, enriched with milk solids and sugar, requires a lower temperature range, usually between 86°F and 88°F, while white chocolate falls within an even lower range due to its lack of cocoa particles.
Moreover, consider the cocoa butter content in your chocolate selection, as higher cocoa butter percentages can significantly affect both the tempering process and the final texture of your chocolates. A chocolate with at least 30% cocoa butter will yield smoother textures and a finer finish; thus, reading labels carefully will ensure you make informed choices. Artisan chocolatiers often prefer couvertures, which are high-quality chocolates specifically designed for coating and tempering, due to their superior fluidity and flavor. These chocolates typically have a higher cocoa butter content, making them easier to work with and better suited for detailed confectionery applications.
Your experimentation with different types and brands of chocolate will not only enhance your understanding of their tempering requirements but also enable you to discover which chocolates produce the tastiest end results. A variety of chocolates offers a palette to explore rich flavors, textures, and potential pairings, allowing for innovative creations that elevate your craftsmanship in the chocolate-making process.
Common Mistakes and How to Avoid Them
Overheating Chocolate
Your chocolate’s temper can be ruined in an instant if it overheats. The ideal melting temperature for chocolate varies by type-dark chocolate should be melted between 120°F and 130°F, while milk and white chocolates require slightly lower temperatures of around 105°F to 115°F. When chocolate reaches temperatures beyond these recommended heat zones, the cocoa butter crystals begin to break down, leading to a grainy texture and dull appearance once set. If you’re using a microwave, opt for short bursts of heat at lower percentages, stirring frequently to monitor the temperature accurately.
chocolate tempering machine. These appliances are designed to provide precise temperature control, taking a significant burden off your shoulders and ensuring consistency and quality in your results.
Inadequate Cooling Techniques
A common misstep in the chocolate tempering process is inadequate cooling. Once you’ve melted and tempered your chocolate, it’s imperative to cool it down correctly before use. If the chocolate doesn’t cool enough, it may not set properly, resulting in a soft and dull finish. The cooling phase allows the cocoa butter crystals to form the stable structure necessary for a perfect sheen and snap. Aim for cooling your tempered chocolate to around 82°F for dark chocolate and 78°F for milk and white chocolates.
The Role of Ambient Conditions
Temperature and Humidity’s Impact on Chocolate
The ability to temper chocolate successfully hinges significantly on the surrounding temperature and humidity levels. For instance, chocolate is best tempered at around 70°F (21°C). If the temperature rises above 76°F (24°C), you risk melting the cocoa butter crystals that you have worked to stabilize, causing undesirable textures and a dull finish. Similarly, when humidity levels surpass 50%, condensation can form on the chocolate, leading to blooming-a phenomenon where sugar crystals surface, ruining the visual appeal and texture you strive for. Understanding these conditions is vital as they can vary dramatically in different environments, affecting the outcome of your chocolate products.
In regions with high humidity, consider investing in a dehumidifier or air conditioning to maintain a stable, dry atmosphere. This control helps in safeguarding the chocolate during both the tempering phase and the setting process. Additionally, low humidity can draw moisture from your chocolate, leading it to seize and clump. Knowing how humidity impacts chocolate texture allows you to adjust your methods accordingly, ensuring a smoother finish. Frequent checks of both temperature and humidity using reliable devices can guide your work in real-time, allowing you to adapt and avoid mishaps.
When you’re working in a kitchen environment where these ambient conditions fluctuate, adapt your approach. One effective method is the “water bath technique” during tempering, where placing the bowl of chocolate over warm water helps maintain a consistent heat. The wisdom of traditional chocolatiers suggests cooling your tempered chocolate down to around 82°F (28°C) before molding it for better results. Keeping a thermometer handy allows for precise adjustments, and understanding the ambient challenges helps you achieve the perfect sheen and snap, hallmarks of expertly tempered chocolate.
| Temperature above 76°F (24°C) | Melting cocoa butter crystals, resulting in poor texture and dull finish. |
| Humidity above 50% | Condensation causes sugar bloom, compromising visual appeal and texture. |
| 70°F (21°C) Ideal range for tempering | Maintains stability of cocoa butter crystals for optimal finishing. |
Best Practices for Working in Various Environments
To ensure you are maximally prepared for any workspace conditions, adopt strategies that incorporate flexible techniques. Whether you find yourself in a home kitchen, commercial facility, or artisanal shop, it’s vital to keep your tools and environment in top shape. Start by organizing your workspace efficiently; having all tools within reach can minimize the time chocolate is exposed to fluctuating temperatures. Always use a quality digital thermometer, which can accurately track the chocolate’s temperature even if conditions change. If you are in a particularly warm area, consider working in shorter intervals, allowing your chocolate to stabilize between meltdowns.
Be aware of the materials you use. For instance, metal bowls conduct heat differently than glass or ceramic. Conduct experiments with various materials to discover which works best in your specific conditions. Furthermore, keep your chocolate covered to prevent moisture absorption, especially in humid environments. Additionally, cooling your mold in the refrigerator before pouring tempered chocolate helps achieve a quicker set time, countering the effects of any ambient warmth.
In extreme environmental conditions, moving your chocolate operations to a controlled space can yield significant benefits. If you typically produce chocolates in an area of high humidity or heat, you may benefit from relocating to a climate-controlled facility during warmer months. Partnering with local venues that provide such environments can also be a strategic move. Your ability to control the variables surrounding chocolate production is vital to the finish and flavor of your chocolates.
Mastering Flavor Infusions
Pairing Ingredients with Tempered Chocolate
When you choose to enhance your tempered chocolate, the right pairings can elevate your confection far beyond basic sweetness. Think about contrasting flavors that complement the richness of chocolate-sea salt, for instance, adds a touch of savory that balances intense sweetness, while fruits like raspberries or passion fruit introduce tartness that brightens each bite. Spices such as cardamom or chili bring warmth and depth, creating a complex flavor profile that excites the palate. You may also consider incorporating herbs; mint or basil can lend surprising freshness, turning your chocolate into a sophisticated delicacy.
Your experimentation should include considering the origin and quality of your chocolate as it plays a significant role in how flavors meld. For example, a dark chocolate with high cocoa content pairs beautifully with bold flavors, while a milk chocolate with a sweeter profile can harmonize with gentler ingredients. Detailed attention to the balance of acidity and sweetness will allow you to refine the flavor combinations-using an acid like citrus zest can wake up floral notes in your chocolate that you might have otherwise overlooked.
The manner in which you incorporate these ingredients is equally important. Infusing extracts or oils, like almond or orange, into the chocolate can create a uniform distribution of flavor. Alternatively, you can layer ingredients by decorating your chocolates with a sprinkle of sea salt post-tempering or by filling your shell with fruits or nuts. Each approach offers a unique tasting experience, thus empowering you to craft chocolates that reflect your personal style and the specific moods you wish to evoke in your audience.
Enhancing Chocolate with Textures and Additions
Textures play an crucial role in the enjoyment of chocolate, inviting the consumer to engage with the confection in tactile ways. For instance, you might think about incorporating crispy elements like puffed rice or caramelized nuts to create a delightful crunch that contrasts with the smoothness of tempered chocolate. Textured inclusions not only heighten the sensory experience but also contribute to the overall visual appeal; a chocolate bark adorned with various toppings becomes an instant showstopper on a dessert table.
When adding textures, also consider the size and shape of your inclusions. Larger chunks of nougat or crispy wafers will impart a bold crunch while allowing the chocolate to maintain its melt-in-your-mouth essence. Conversely, finely chopped ingredients can impart a more delicate texture, providing subtle bursts of flavor as they dissolve alongside the chocolate. Each choice you make should align with the overall flavor theme you are pursuing, creating a seamless integration that enhances rather than overwhelms.
Your considerations should extend beyond just taste and texture; the visual aspect is undeniably influential as well. Think of contrasting colors-dark chocolate paired with bright orange zest will not only be delicious but also visually striking. The layering of different textures, like smooth chocolate with crunchy toppings, creates an artistic impression that captivates before the first bite. Ultimately, these enhancements allow your artisanal chocolates to tell a story, engaging your audience on multiple levels through flavor, texture, and appearance.
Final Words
Understanding the process of tempering chocolate empowers you to create a glossy, sturdy finish that enhances both the taste and presentation of your chocolate creations. By carefully managing temperature, you can stabilize the cocoa butter crystals, resulting in chocolate that snaps perfectly and melts smoothly. The techniques employed by artisanal chocolatiers, from seeding to tabling, enable you to achieve that desired texture and shine, ensuring your confections stand out in both quality and aesthetic appeal.
The importance of patience and precision in the tempering process cannot be overstated. As you research deeper into these techniques, you will discover that small variations in temperature can significantly influence the outcome. You will want to monitor the chocolate closely, using a thermometer to track its progress. By mastering your approach to melting and cooling, you build a strong foundation that allows you to experiment with flavors and inclusions while maintaining optimal chocolate quality.
Ultimately, your dedication to learning the art of tempering chocolate will enrich your skills as a chocolatier. Each successful batch of tempered chocolate not only enhances your creations but also builds your confidence in the kitchen. As you continue to refine your technique, you’ll develop a personal style that reflects your passion for chocolate, allowing you to impress friends and family with beautifully crafted treats that celebrate the mastery of this delectable craft.


