Best Techniques for Tempering Chocolate Without Special Tools
techniques you can use at home let you temper chocolate without special tools; maintain precise temperature, avoid burning or seizing, and achieve a shiny snap

This article contains Amazon affiliate links. As an Amazon Associate, CandiesAndSweets earns from qualifying purchases.
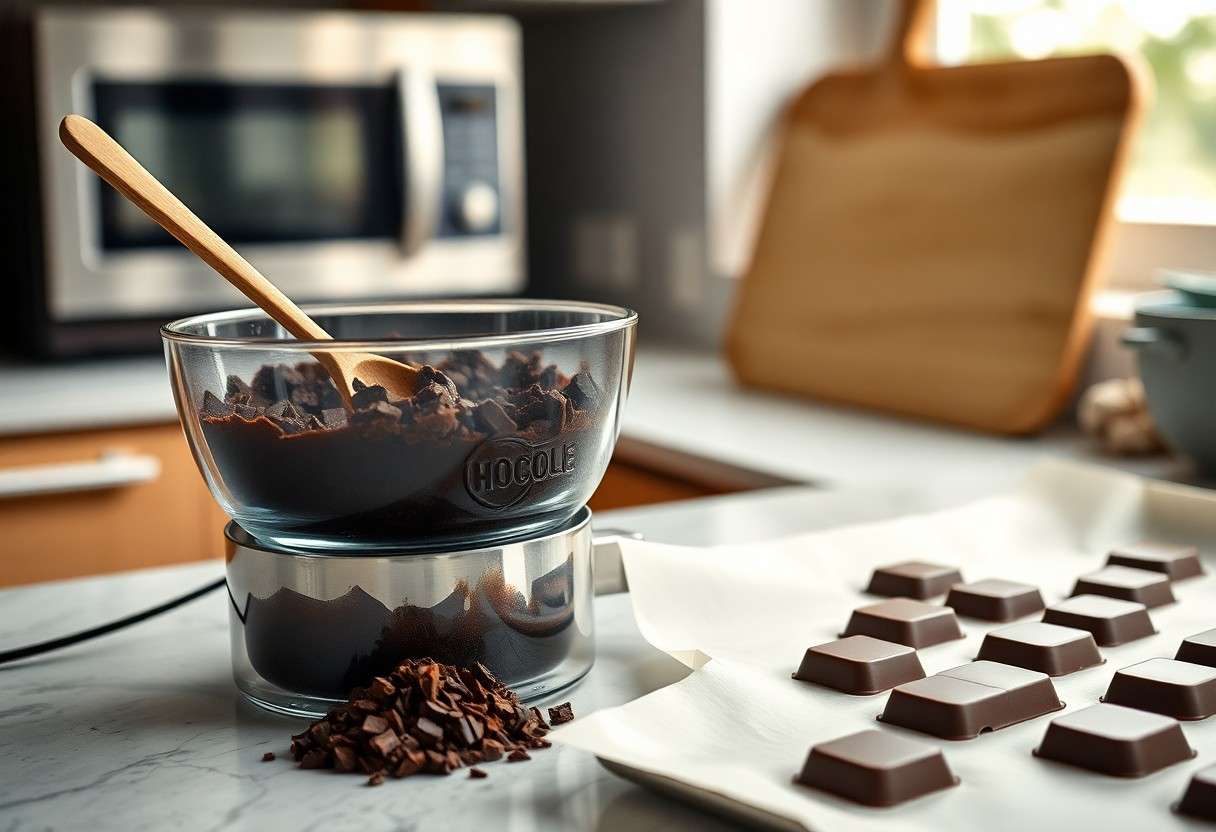
techniques you can use at home let you temper chocolate without special tools; maintain precise temperature, avoid burning or seizing, and achieve a shiny snap using stovetop, seeding, or microwave methods.
The Science of Chocolate Crystallization
When you manage crystal types in cocoa butter you set texture and shine; target Beta-V for a glossy, firm bar and avoid overheating that destroys seeds and yields dull, soft chocolate.
Understanding Beta-V Crystal Formation
You encourage Beta-V by melting fully, cooling to form seed crystals, then gently reheating into the working range so the stable form outcompetes others; watch moisture and stray fats that block proper growth.
Beta-V Formation Factors
| Factor | Effect |
|---|---|
| Seed crystals | Promote stable Beta-V nucleation |
| Temperature control | Proper melt/cool/reheat cycle preserves seeds |
| Contamination | Moisture or other fats cause bloom and softening |
Temperature Profiles for Dark, Milk, and White Varieties
Dark chocolate: you melt to 45-50°C, cool to ~27-28°C, then reheat to 31-32°C; Milk chocolate: you melt to 40-45°C, cool to ~26-27°C, then reheat to 30-31°C; White chocolate: you melt to 40-45°C, cool to ~25-26°C, then reheat to 28-29°C.
Follow gentle reheating within those working ranges so Beta-V stays dominant; rapid heating risks overheating and visible bloom.
Temperatures by Variety
| Variety | Melting / Cooling / Working (°C) |
|---|---|
| Dark | 45-50 / ~27-28 / 31-32 |
| Milk | 40-45 / ~26-27 / 30-31 |
| White | 40-45 / ~25-26 / 28-29 |
Essential Preparation for Tool-Free Tempering
Prepare your workspace with clean, dry bowls, a reliable thermometer if available, and pre-weighed chocolate so you can control batches. Keep no moisture near your chocolate and clear clutter to prevent accidental contact or overheating.
Ensure your utensils are dry and at room temperature, and chop chocolate into uniform pieces to promote even melting. Use small batches so you can manage temperature by hand and avoid burning the chocolate.
Selecting High-Quality Couverture vs. Compound Chocolate
Choose couverture for superior gloss and snap since its cocoa butter responds well to tempering with seeding or tabling; you’ll get a cleaner bite and better flavor when handled correctly. Aim for a shiny finish by controlling temperature and agitation.
If convenience wins, use compound chocolate that melts easily without strict tempering and tolerates warmer conditions, though it yields a duller shine and different mouthfeel. You can still apply tool-free techniques but expect varied results.
Managing Ambient Humidity and Heat Sources
Control room humidity below 50% where possible and keep steam or boiling water away from your work area since water will seize chocolate. Place bowls away from ovens and direct sunlight to maintain steady temperatures.
Avoid drafts from vents or open windows that cause uneven cooling and potential bloom later; gentle, consistent air is preferable when needed. Use a thick towel to insulate bowls if surfaces chill too quickly.
Monitor ambient temperature and target a cool, dry spot around 18-22°C so your chocolate sets predictably, because rapid swings in heat can undo tempering; move bowls if nearby heat sources interfere.
The Seeding Method: Stability Through Manual Agitation
You melt about two-thirds of your chocolate to the recommended temperature, then add finely chopped unmelted chocolate as seed while stirring until glossy and slightly thickened; avoid any water or steam that will seize the batch.
Stirring continuously, you agitate in steady, short strokes to encourage the formation of beta crystals, and you should keep a kitchen thermometer close to maintain the temper window.
Calculating the Seed-to-Melt Ratio
Measure seed at roughly 25-30% of the melted weight for dark chocolate and 20-25% for milk or white to give you a reliable starting point; precise ratios improve stability.
If you find the chocolate thickens too fast, you reduce the seed by 2-5%; if it sets slowly, you add a few grams and test again until the texture and snap are right.
Techniques for Consistent Cooling Without a Marble Slab
Work on a cool, dry counter and stir frequently while you spread warm chocolate thinly against the bowl sides so it cools evenly; avoid drafts and water contact.
Place the mixing bowl briefly over an ice bath while you stir, then return it to warm water as needed to fine-tune temperature without a slab; this mimics the cooling and reheating cycle. You might also enjoy our guide on Mastering the Art of Chocolate Tempering at Home.
Rotate between warm and cool zones by moving the bowl from a warm water bath to your cool countertop, testing with a spoon so you can confirm that properly tempered chocolate will set firm with a clean snap.
The Microwave Technique: Efficiency and Precision
Microwaving in short bursts lets you melt chocolate quickly while maintaining control; use 20-30 second intervals for dark chocolate and 10-15 for milk or white, and stop immediately if steam or splattering appears to avoid severe burns.
Pair timed heating with stirring to even temperatures, so you get a glossy finish and consistent crystals without special equipment, and reduce power to 50% for delicate whites to prevent scorching.
Managing Heat Intervals to Prevent Scorching
Use medium-low power and short bursts to prevent hotspots; check progress by scraping a cooled spoon-if the chocolate seizes or smells burnt, you have overheated it and must cool slightly before continuing.
Alternate heating with stirring so residual heat finishes melting small pieces; this helps you keep the mass below target temperatures and reduces the chance of scorched, grainy results.
Achieving Professional Snap Through Intermittent Stirring
Stirring between bursts redistributes heat and encourages formation of stable crystals, letting you approach temper without special molds; avoid any contact with water, since even a drop will seize the chocolate.
Aim for short, frequent stirs that scrape bowl sides and reincorporate cooler bits to produce a firm, glossy result and a clean snap.
Continue testing small amounts on parchment to confirm set; you should see a firm snap in 20-30 minutes at cool, dry room temperature, and steer clear of humid conditions that soften finished chocolate.
The DIY Bain-Marie Approach
Using a bowl over simmering water gives you gentle indirect heat for tempering; you should stir constantly and keep the bowl and tools completely dry because even a drop of water will make the chocolate seize. You can work small batches to maintain control and avoid overheating.
Keep the water at a gentle simmer and lift the bowl off heat to check texture; you should scrape the sides and test a spoonful on a plate. A glossy, flowing finish signals good temper, while dull or clumped chocolate indicates overheating or instability.
Setting Up a Safe Indirect Heat Source
Select a heavy-bottomed saucepan and a heatproof bowl that fits snugly without touching the water. You should maintain a gentle simmer and handle hot bowls with care to avoid scalding, since steam or splashes will cause the chocolate to seize.
Position the bowl so it rests stably and keep a towel under the pan to catch spills. You should keep children and pets away and use oven mitts when lifting the bowl to prevent burns or knocks that could spill hot water into the chocolate.
Monitoring Viscosity and Emulsion Stability
Watch viscosity by dragging a spatula through the chocolate; the trail should slowly close back, showing proper flow. You can revive slightly thick chocolate with short bursts over warm water, but avoid overheating which breaks the emulsion and risks graininess.
Test temper by spreading a dab on a chilled plate; you should look for a quick set with a shiny surface and firm snap, while tacky or blotchy patches mean you need gentle reheating or more agitation.
Observe visual cues without gadgets: if chocolate clings and resists flow it’s cooler than ideal, while puddling signals excess heat; you should alternate brief rests off heat and brisk stirring to rebuild the emulsion, adding a tiny piece of tempered chocolate only to rescue separation-this can fix texture but may cause over-tempering if overused.
Troubleshooting Common Tempering Failures
If your chocolate seizes or turns grainy, stop adding liquids and gently reheat in short bursts, stirring frequently. You can smooth texture with a teaspoon of melted cocoa butter while keeping the bowl dry, because introducing water risks seized chocolate and ruined temper.
When gloss or snap vanishes, verify temperatures and use the seed method to rebuild stable crystals by stirring in finely chopped tempered chocolate. If corrections fail, melt to 45-50°C and retemper slowly to restore the desired sheen and snap.
Identifying and Fixing Fat Bloom
Inspect finished pieces for pale gray streaks or a powdery film; that indicates fat bloom from fat migration or temperature swings. The bloom is harmless to eat but damages appearance, so remelt and retemper or trim and reseal for presentation; fat bloom is cosmetic.
Spot-prone conditions include rapid cooling or refrigeration that causes condensation and movement of fats. To prevent bloom, cool chocolate evenly at stable room temperature and avoid sudden temperature changes so stable crystals remain intact.
The Knife Test: Verifying Set and Sheen
Test temper by scraping a clean knife across a small dab of chocolate and observing set: properly tempered chocolate will firm in minutes with a glossy surface and a firm snap. If it stays tacky or dull, retemper using the seed method or gentle reheating. You might also enjoy our guide on The Art Of Artisan Candies – How Craftsmanship Elevates Sweet Treats.
Use a chilled plate or the knife edge to check: a clean, glossy coat that breaks cleanly indicates readiness, while sticky residue signals under-tempering and a streaky, matte finish shows inconsistent crystallization.
Repeat the knife test at intervals during long jobs to catch temperature drift; keep working chocolate at target temperatures and adjust with tiny amounts of melted, tempered chocolate until you achieve the sheen and snap you want.
Final Words
Following this, you can temper chocolate without special tools by using seeding or controlled microwave bursts and constant stirring to achieve glossy sheen and firm snap. Use a cool metal bowl or marble slab to cool melted chocolate, add chopped tempered chocolate as seeds, and test a dab on parchment until it firms. With steady heat control and frequent stirring you will get reliable results for coating, molding, and finishing confections. You might also enjoy our guide on How Artisanal Chocolatiers Temper Chocolate Perfectly.